AD5763-300 Factors of Caliper Measurement Error
Calipers can introduce errors in measurement results during usage.
There are various factors contributing to these errors, and in this article, we will present the main factors of measurement errors.
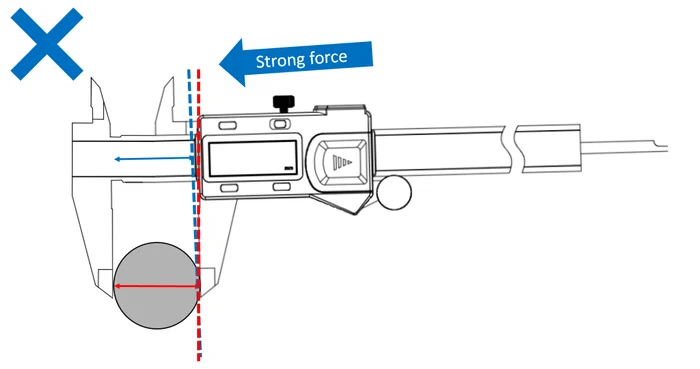
①Applying excessive measuring force
Calipers operate in a way that contradicts Abbe’s principle, so applying excessive force during measurement can lead to errors between
displayed values and true values. Abbe’s principle states that aligning the measurement object and the measuring instrument’s scale on the
same axis can minimize measurement errors and enhance accuracy.
As calipers do not align measurement and scale positions on the same line, they deviate from Abbe’s principle and become
instruments that go against it.
When not following Abbe’s principle, as shown in the diagram below, applying excessive force can result in the measuring part
and scale not being parallel, leading to errors.

②Thermal expansion
This is not unique to calipers; when measuring the length of an object, consideration for temperature conditions is essential.
Objects experience changes in volume due to thermal expansion, leading to variations in length.
Room temperature around 20°C is considered ideal.
Both the measuring instrument and the object to be measured should be allowed to acclimate to room temperature before measurement.
③Beak thickness and clearance
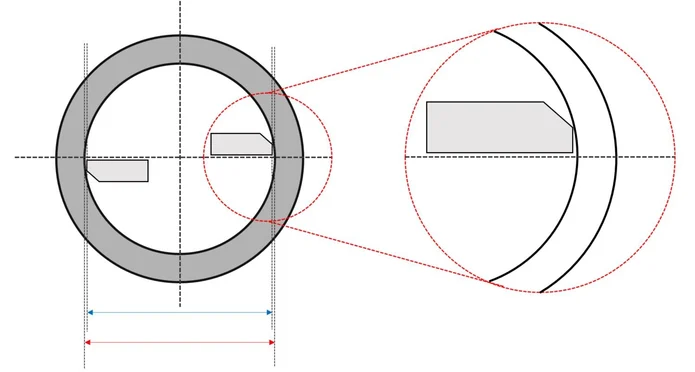
When measuring the inner diameter of small holes, errors can arise due to the thickness of the inner measurement jaws (beak)
and the clearance between the inner measurement jaws (beak).
As shown in the diagram below, a gap can form between the beak and the hole, causing a measurement that is smaller than the actual diameter.

This error becomes larger when the beak thickness is greater, the clearance between the beaks is larger,
and the hole diameter is smaller.
The following sections, from ④ to ⑥, should all be controlled within instrumental error,
and with calipers that satisfy the instrumental error requirements, these are not problematic.
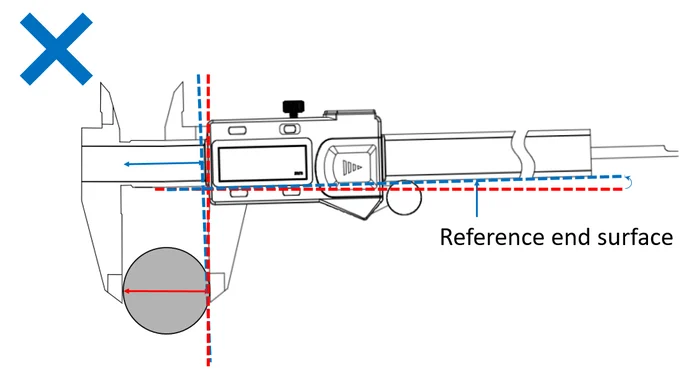
④Straightness of the reference end face
If there is any curvature on the reference end face, measurement errors will occur as shown in the diagram.
The red dashed line represents the correct measurement using a caliper without curvature,
while the blue dashed line represents the measurement with errors due to a caliper with curvature.

⑤Right angle of the jaws
The jaws need to be perpendicular to the main scale and the reference end face.
If the jaws are at an angle, similar to ④, the measurement will be smaller than the actual value.
⑥Flatness of the main scale graduation surface
The surface where the scale is engraved must be flat.
There are various other factors contributing to errors, such as parallax and scale accuracy.
Using digital calipers where reading the scale is unnecessary,
or in cases where smaller measurements are obtained than actual, taking the maximum value from multiple measurements
can help minimize errors.
